BRAIN Docs
Binance API Connection Guide
Binance API Connection Guide
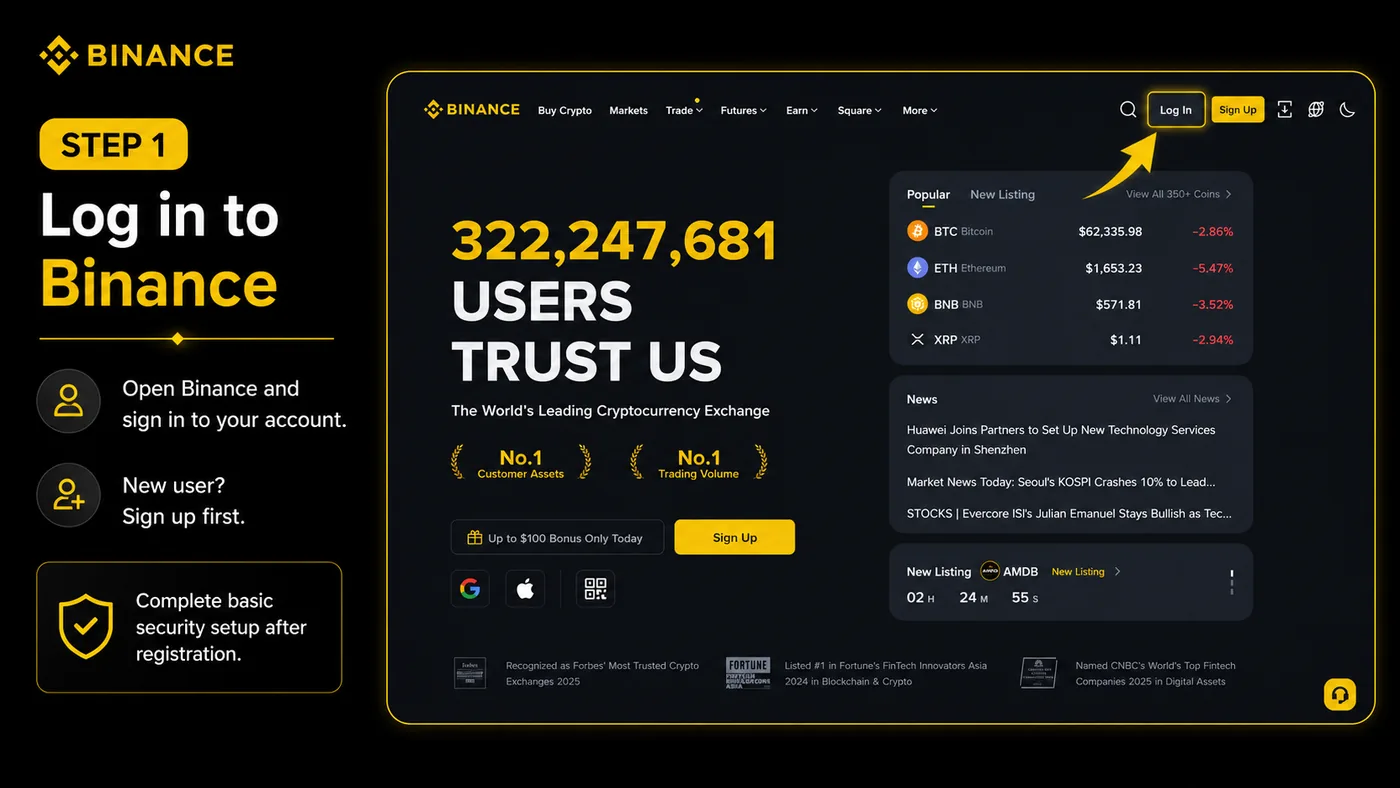
Log in to Binance API Connection Guide your Binance account
Open Binance and log in to your account. If you do not have an account yet, register first and complete the basic security setup.
Check access to futures
Before connecting the API, open the Futures / Derivatives section on the exchange. If the exchange shows an activation window, trading guide, risk notice, or introductory steps, confirm them and complete the short setup. Usually, this is enough to activate futures trading on the account.
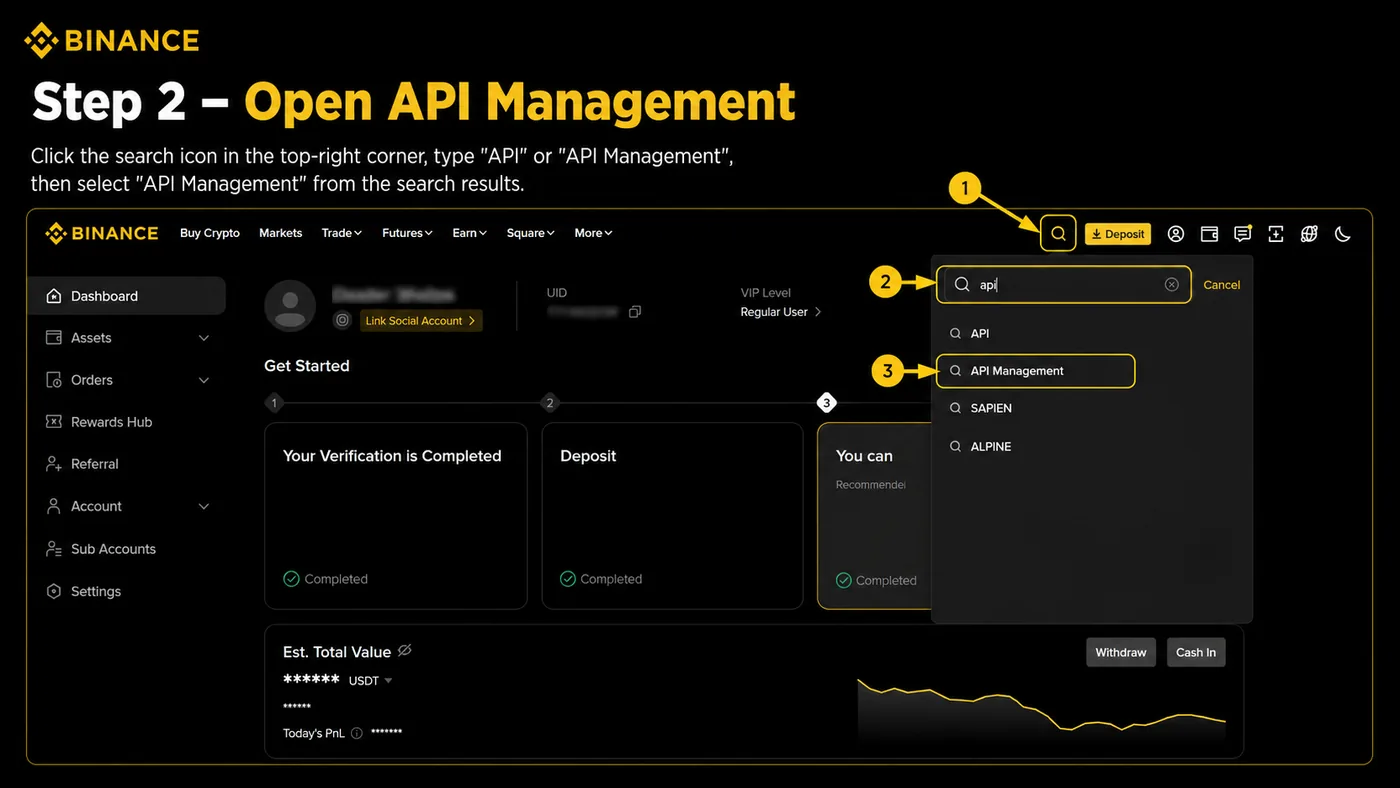
Open API Management
After logging in, click the search icon in the top-right corner, enter API or API Management, then select API Management from the search results.
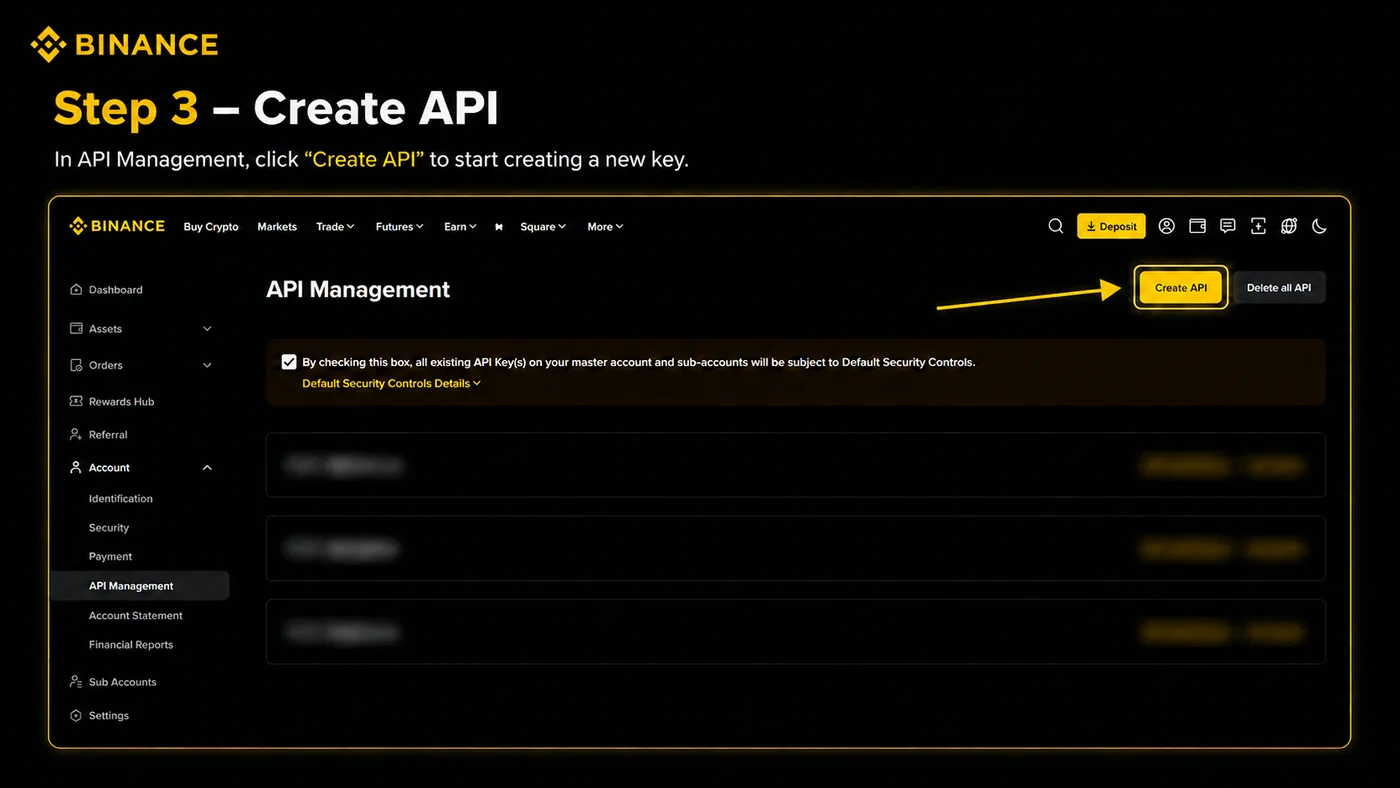
Click Create API
In the API Management section, click the Create API button to start creating a new API key.
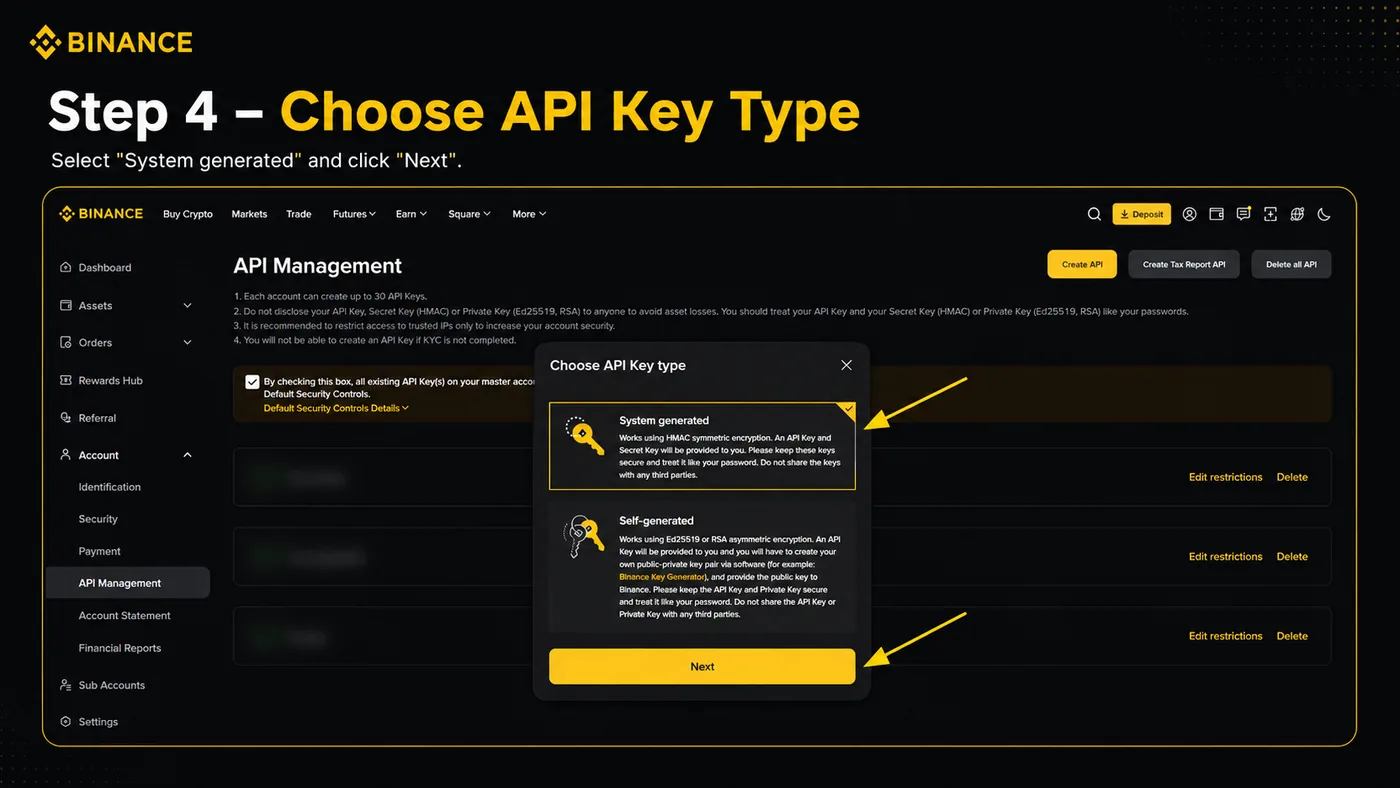
Select the API key type
If Binance offers several options, select System generated, then click Next.
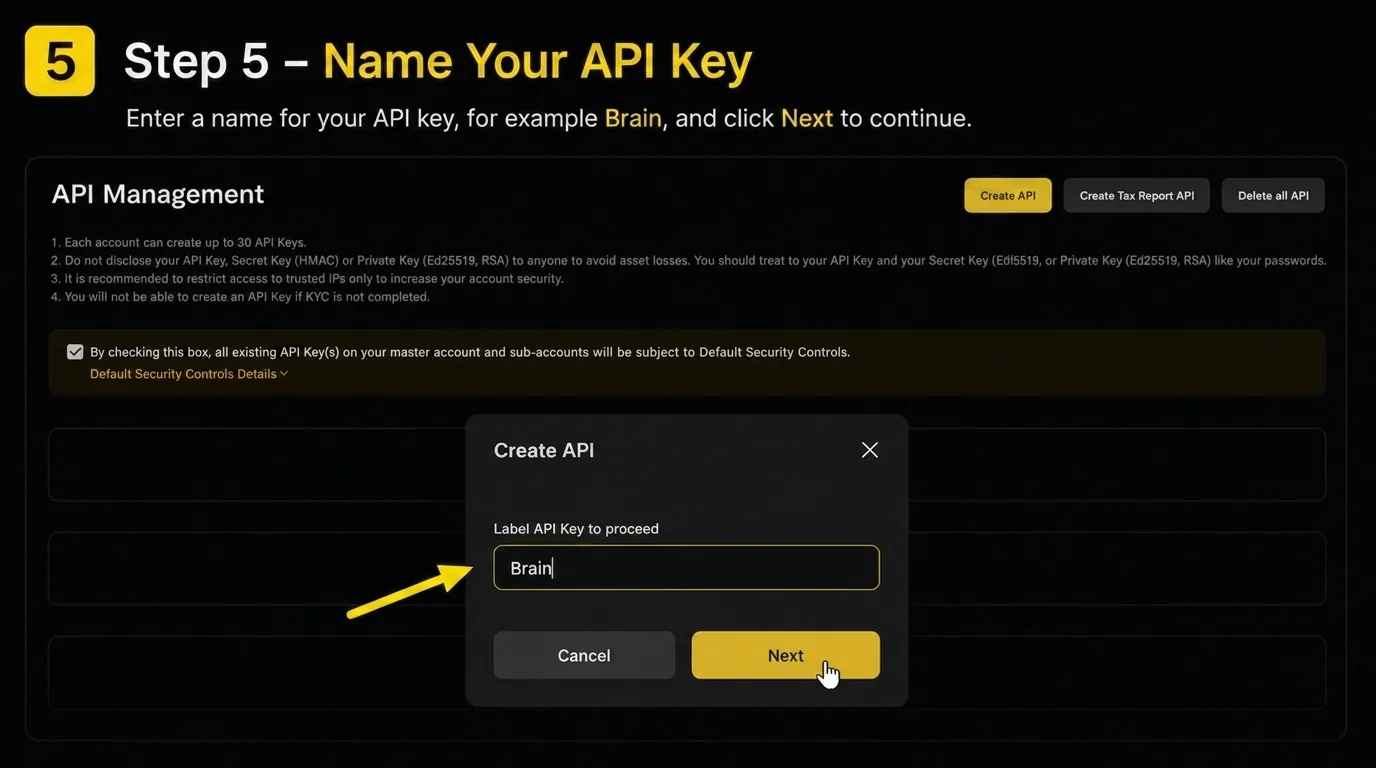
Enter the API key name
Enter the API key name, for example BRAIN, and click Next to continue.
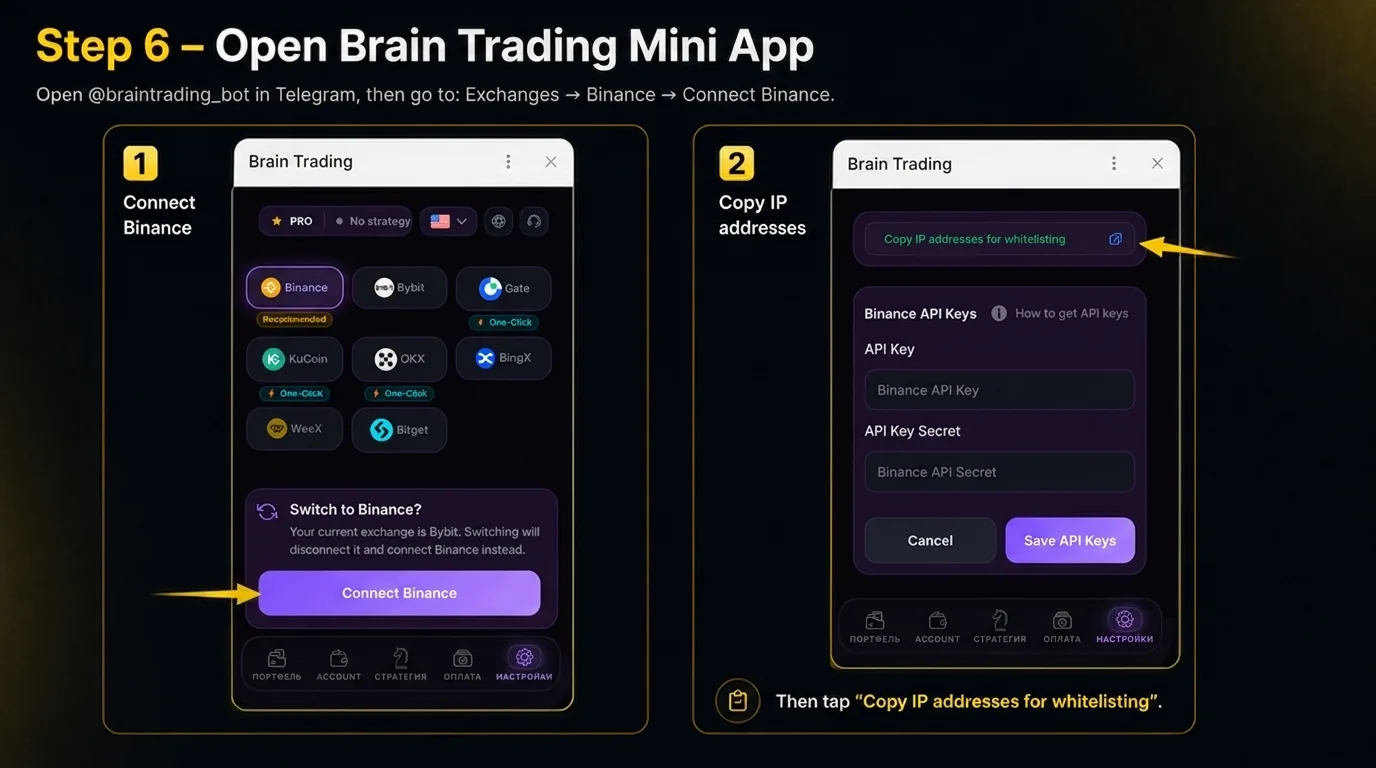
Open BRAIN Mini App
Go to Telegram and open @Brain_Trading_Bot.
Then go to: Exchanges → Binance → Connect Binance.
On the Connect Binance screen, tap “Copy IP addresses for whitelisting” - you will paste them into Binance in the next step.
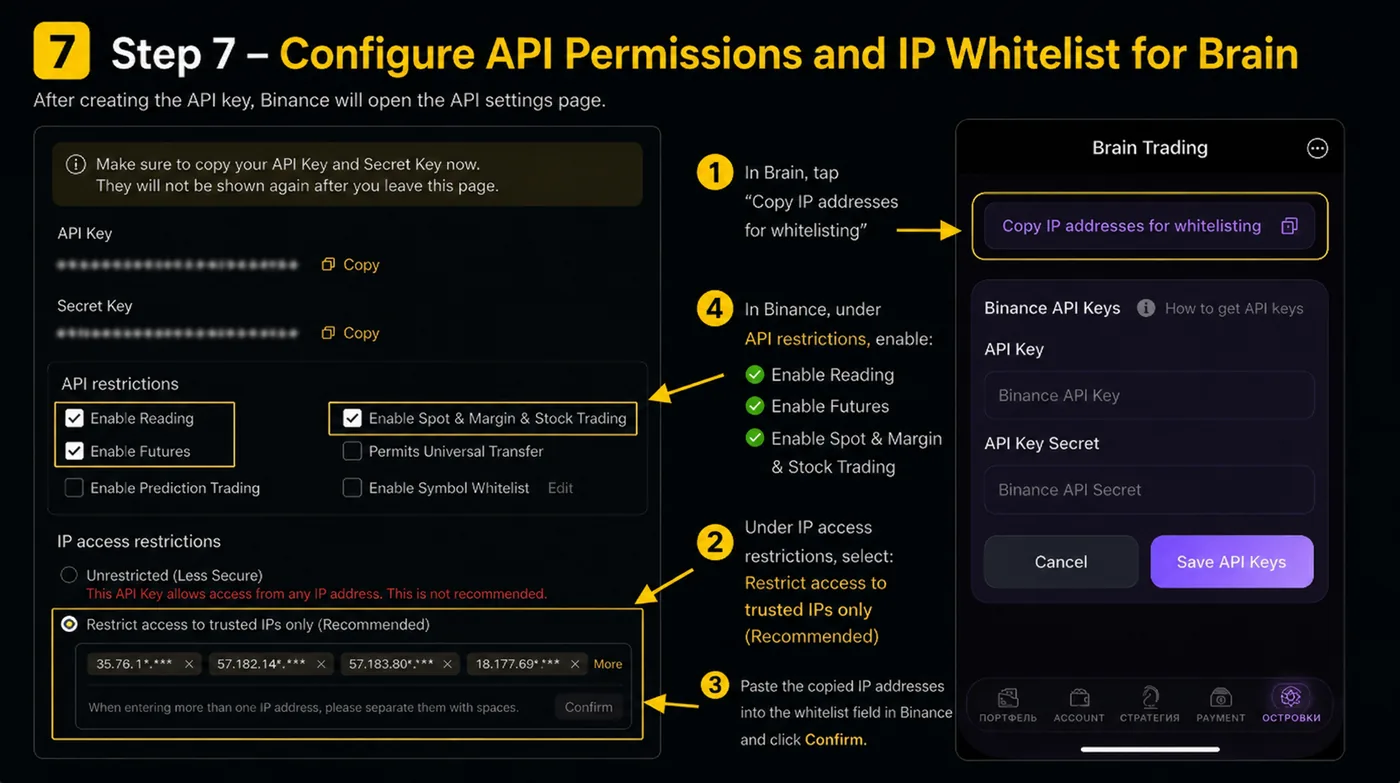
Configure API permissions and IP whitelist
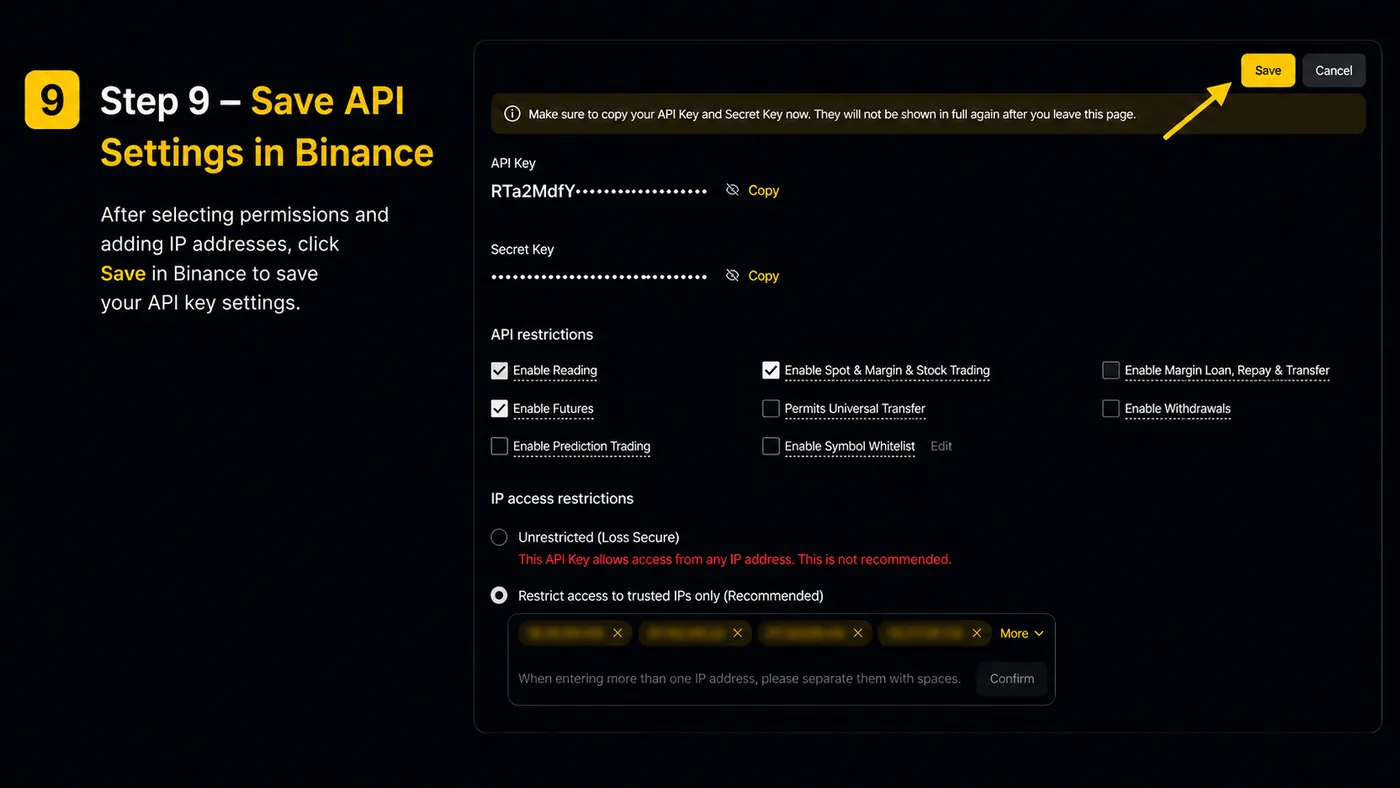
After creating the key, Binance will open the API settings page. Click “Edit restrictions”.
In the IP access restrictions section, select:
Restrict access to trusted IPs only (Recommended)
After that, in BRAIN, paste the IP addresses into the whitelist field. In the API restrictions section, enable:
- Enable Reading
- Enable Futures
That is all BRAIN needs: it trades USDT-M perpetual futures only. Leave “Enable Spot & Margin Trading”, “Permits Universal Transfer” and “Enable Withdrawals” OFF (the screenshots below come from an older setup where Spot & Margin was still ticked - it is not required).
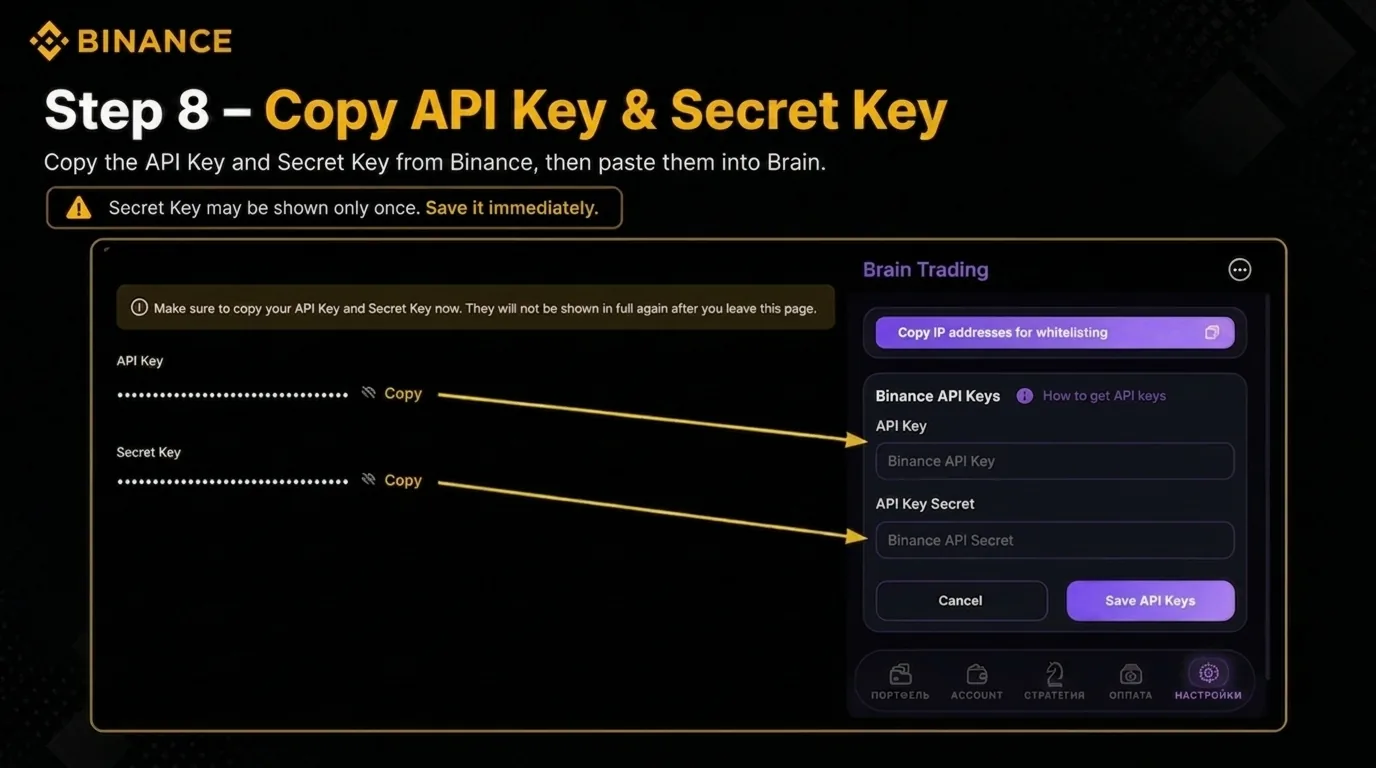
Copy API Key and Secret Key
On the Binance page, copy:
- API Key
- Secret Key
Important
Secret Key may be shown only once, so save it immediately.
Save API settings in Binance
After selecting permissions and adding IP addresses, click Save in Binance to save the API key settings.
Paste the keys into BRAIN and check the connection
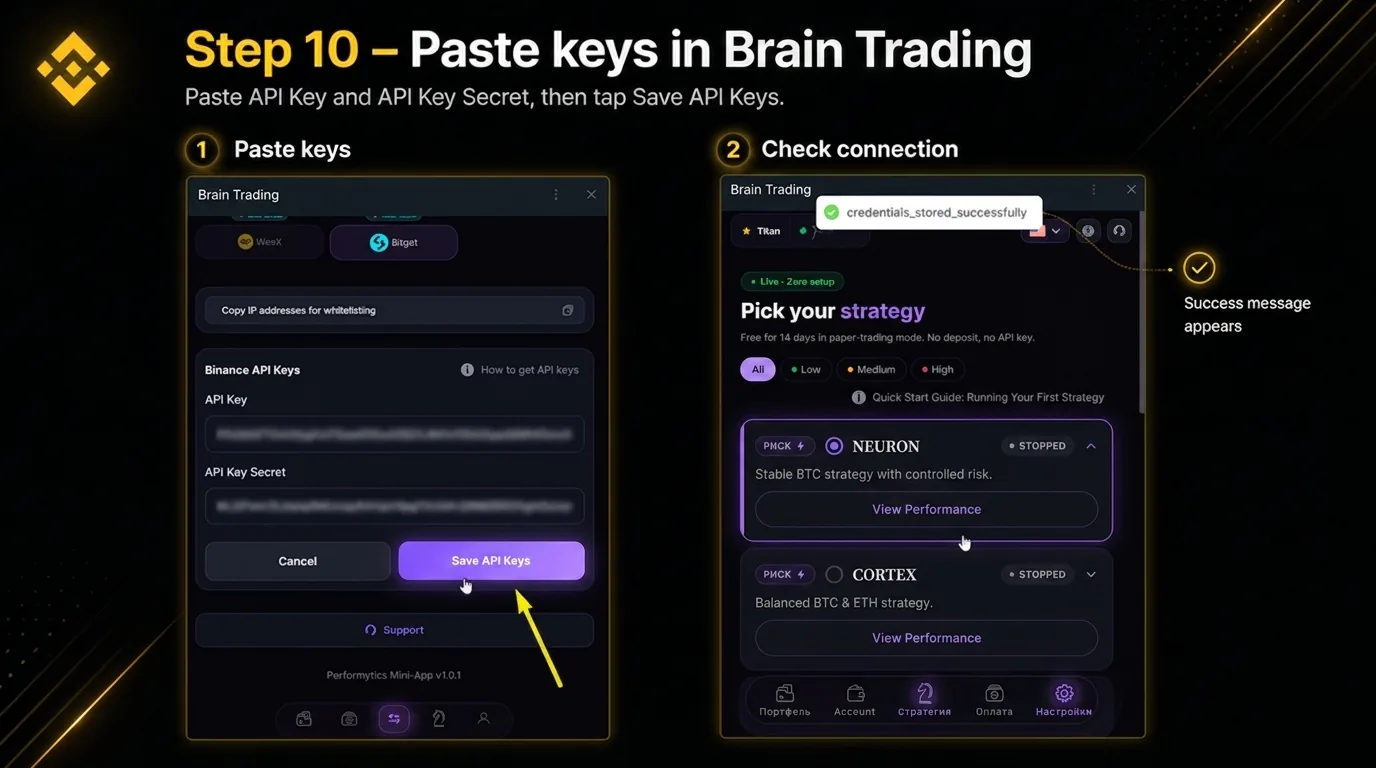
Return to BRAIN Mini App and paste:
- API Key
- API Key Secret
Then tap Save API Keys.
If everything is done correctly, BRAIN shows a confirmation that the keys were saved and the status next to Binance reads Connected. If the status does not update immediately, refresh the Mini App and check again.
Binance notes
On Binance, Secret Key is shown only once after creating the API key, so it must be copied and saved immediately. To connect BRAIN, it is important to select Restrict access to trusted IPs only and not leave the API without IP restrictions. IP addresses from BRAIN must be pasted into Binance in the format accepted by the exchange. After adding them, Binance may display them as separate IP tags. BRAIN needs only Enable Reading and Enable Futures (USDT-M perpetual); Spot & Margin trading, transfers and especially Withdrawals must stay OFF. If you have just registered a Binance account, the exchange may require basic identity verification before creating an API key or using trading functions.